The Objective-C and Swift languages are two of the widely known programming languages that are used for the purpose of iOS application development. In the last few years, we have seen a switch in the trend as the application developers are favoring the swift programming language over the objective-c language. This has also led to an increase in the migration process of converting an objective-c app into a swift application.
What Is Code Migration?
The process of code migration is a great procedure to move the programs from one machine to another, mainly these moving segments include the execution environment of the machine. Migration is a quite popular technique that is used mainly used for its efficient nature meaning, that the app developer can just migrate the mobile or web app code to the preferred programming language directly. For example, the code migration from objective-c to swift.
Instead of designing and developing an entirely new application which will require an investment of more resources and will end up costing a ton. To save you from all this extra work, the migration process is the one to move ahead with.
Need Of Migration Process
The main reason behind this process that convert apps from Objective-C to Swift is that to revise an already existing application and to make improvements in its logic, architecture, and overall performance. This is done by replacing the previously existing pieces of objective c with the newer and better components of swift.
A number of people consider this process to convert a full Objective-C app to Swift as a time consuming and exhausting process but that's not true. You will be surprised to see the simple steps that you need to follow in order to make this migration process work effectively.
The tech giant, Apple has also provided the feature of interoperability between both of these two programming languages so you won't need to hurry the complete process of swift migration from objective c at once.
Why Swift is better than Objective-C
Just a couple of weeks back, we wrote an article on 'Reasons Why Swift is Better than Objective-C'. So instead of going through all those reasons in detail again, let's cut this short and move on to the main part of app migration.

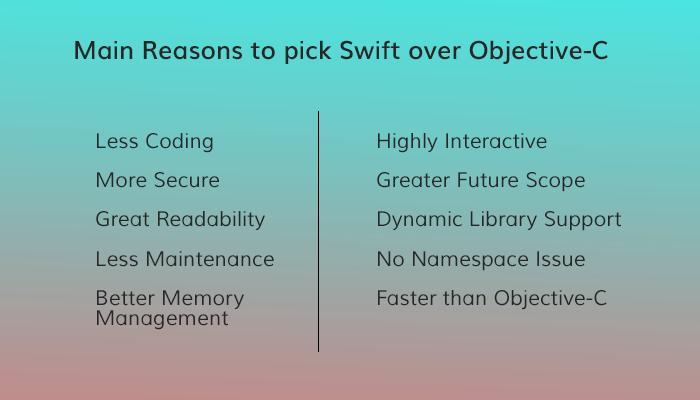
Here are some of the reasons why we choose swift over objective-c and so should you:
- Less Coding: Because swift supports the combining characters and strings by using the '+' operator instead of using repetitive statements in the code lines. This results in reduced complexity of coding statements in swift and also minimizes the amount of coding involved.
- More Secure: During the Swift runtime, the crash will stop on the exact line of code where the nil optional variable has been used. With the help of this feature, swift then tries to completely avoid the bug or else fix the bug as soon as possible in a secure manner while comparing to Objective C.
- Great Readability: After the removal of the extra obligations from this programming language, the Function and Method calls that are used in swift also follow the industry standard i.e. comma-separated parameters within parenthesis. And the output with these industry standards is much more simplified form in terms of the syntax and grammar of the swift code which makes it more readable.
- Less Maintenance: Swift is considered to require less maintenance then objective-c because in Swift the file of objective C header (.h) is combined with the implementation file (.m) so that it can further create a single code file known as (.swift). Here, the LLVM compiler and xCode work independently in order to reduce the task of maintaining the swift code.
- Memory Management: The Swift programming language provides an efficient unified memory management to the application developer which was never provided by Objective C before.
- Highly Interactive: With the option of swift Playgrounds in the developer's hands, the interactivity has increased by 2 to 3 times than the usual level of interactivity. These Playgrounds enable the app programmers to test out an already existing graphics routine or even a brand new algorithm.
- Future Language: For a majority of application developers, swift has already become a more favorable programming language for app development than objective c. This is mainly because the growth swift has achieved in the span of the last five years.
- Dynamic Library Support: There's no denying the fact that swift’s dynamic library plays a vital role in the app development process as they are external to the application but are included within the app's bundle which is downloaded from the app store. These swift libraries help in reducing the initial size of the app as the user directly download it into the memory of his/her device.
- Namespace issue: The namespace issue is solved in swift language because they are based on the target where a particular code file resides. This makes it easier for the application developers to differentiate classes and values by using a single namespace identifier which works efficiently with the open source frameworks as well as libraries in swift code.
- Faster Language: Because swift uses the generics and higher-order functions, due to which this programming language has become a more easy, neat and reusable option as one of the best tools for mobile app development.

Steps involved in Code Migration
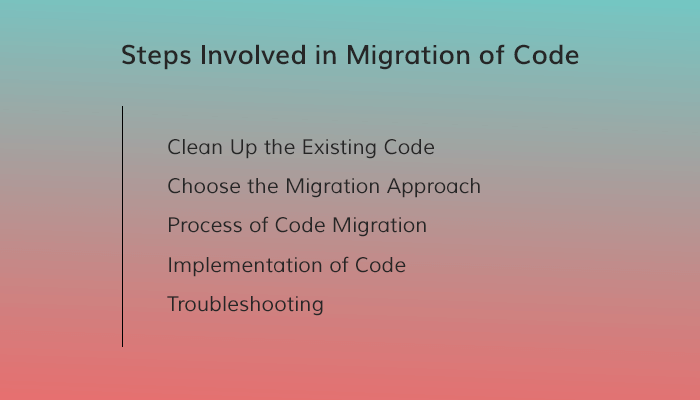
Below are some points to remember before migrating your code or moving from objective-c to swift. These are the steps that should be followed in a proper order to make the swift code migration procedure smooth:
Cleaning Up your Code
The very first thing that you need to do before starting the migration process is clean up your code. Here, you need to make sure that your objective c code is compatible with the swift code. This can be done by optimizing and modernizing your existing lines of codes.
Suppose, your existing codebase suffers with ineffective interaction then it is your job to make sure that all latest practices are being followed followed by your code. This step is important for swift migration because if your existing code is not clean and consists of several issues then the migration process will also give rise to various complications.
Code Migration Approach
When the app developer wants to convert objective-c project to swift application, the approach that is mainly adopted is on a per-file basis which means going to one class at a time. This approach is best suited because there are no swift subclasses in objective c, for which the developer then select a class that doesn't have any subclasses.
Here, the developer will replace all the .h and .m files with a single .swift file for the class with no subclasses that was earlier selected by the developer. Now everything related to the interface and its implementation will move directly to the .swift file and the XCode automatically generates a header file so there is no need to create a header file manually.
- First, create a swift class for all your corresponding .h and .m objective-c files by selecting the option from - File > New > File > (iOS, watchOS, tvOS, or macOS) > Source > Swift File. You can either pick a different name or choose the same name as your previous objective-c class whose code you want to migrate, the class prefixes are optional in swift.
- Then the next step is to import all your relevant system frameworks.
- Now, you need to fill out the objective-c bridging header so that you can get the access for the objective-c code from the earlier same app target that is in your swift file.
- In order to make your new swift class easily accessible as well as usable in the objective-c, just make a descendant of that objective-c class. Be careful with the name of this new descendant created, specify it with a particular name so that you can remember that your objective-c codebase uses the reference if this newly created swift class. For example: @objc(name).

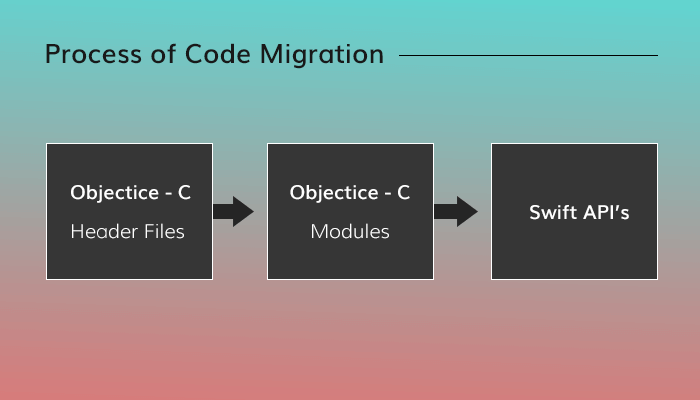
Process of Code Migration
- Now that you have proceeded with the approach of the code migration process, you can set up the newly created swift class to integrate with the objective-c by subclassing the objective-c classes and adapting to the objective-c protocols.
- Once the integration has begun, then move to the customization part to know how to migrate from Objective-C to Swift with respect to the objective c APIs.
- The name @objc(name) that was finalized in the above step, will now be used as an attribute to provide the objective-c names for the methods and properties if required.
- Now, you can denote the instance (-) method and class (+) method with the respective class functions.
- After denoting the methods, simply declare the macro-instructions in swift as the global constants and then translate these macros into the functions.
Implementation of Code
- To convert a full Objective C app to Swift, you also need to update the import statements in your previous objective C code, by doing this you can refer your new swift codebase.
- The removal of the original objective C .m file from the target is essential. You don't have to delete those .h and .m files but you would have to deselect them from the checkbox of target membership.
- The last step in implementation is to update the code so that it can now use the name of the swift class instead of the previous objective c class name.
Troubleshooting
The process of swift code migration may sometimes differ on the developer's existing codebase, that's why troubleshooting is required as the final step to end the process and verify it.
- Always remember that you can not subclass a swift class in the objective c, so the class that you migrate cannot have any objective c subclasses to it.
- When a class is migrated to the swift, you also need to deselect the corresponding .m file from the target checkout. If you fail to do this, then there will be a duplicate symbol error.
- If you want to make a class of swift available in objective c, just make a descendant of the objective c class.
- To see implicit information about a symbol including details like attributes, type, documentation etc. option-click that particular symbol.
- If you want to know about the generated header of a swift class name, just command-click to view the details.
So, these were the steps that are to be followed to successfully convert your objective c code into swift code. We hope that this article shared some valuable insights on this topic to convert your app into swift from objective-c.
Let us know if you have any further doubts on how to change your app from Objective-C to Swift, in the ‘Comment’ section down below. And for more trending updated from the App Development Industry, keep on following MobileAppDaily by clicking on that ‘Subscribe’ button.


