
 Here, you will find the step-by-step process of implementing IAP with Swift
When it comes to iOS applications, we have a lot of choices to choose for monetizing our iOS apps. Some of the well-known methods for making a decent amount of money from your iOS app are:
- Launching a paid version of your app
- Insert ads in your free application
- Add in-app purchases in your free app
What are In-App Purchases
The in-app purchases also known as IAP allows the developers to charge the user a particular amount for accessing a specific content or functionality as an extra feature while using the application.
Here are some examples of in-app purchases:
- In photo editing apps, you can see the option of spending a dollar or two for extra editing effects.
- While playing games, the user often gets a notification to use virtual currency to modify their virtual appearance in the game.
- Many apps even ask their user to subscribe to the app's regular updates and get member-only benefits.
Types of In-App Purchases
There are four types of In-App Purchases (IAP) which are described in the following:
#1 Consumable IAP
This is the type of IAP where the user will need to buy preferred items every single time if they want to use them. So, basically, you can not use these items for free in the future without paying for them.
The user may also lose the access to these items if the app is reinstalled or their smartphone is changed. Some examples of the consumable type are purchasing hints and collecting game currencies.
#2 Auto Renewing Subscription IAP
In auto-renewal subscription type of in-app purchases, the user can make a purchase of an item for a limited period of time. And once that limited time period is over then the subscription for that item will be renewed automatically.
Few examples of the auto-renewing subscriptions type are magazine subscriptions like Vogue and on-going services like Netflix etc.
#3 Non-Consumable IAP
In the non-consumable type of IAP, the user has to only pay for an item once and then that item is free to be used in the future. Even if the app is reinstalled or the device has been changed, the item will still be accessible and will not lose its data.
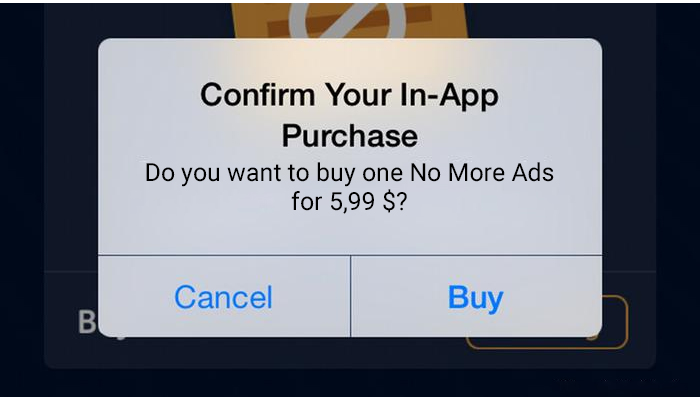
Few examples that fall into the category of non-consumable IAP type are a PRO version app upgrade, removal of advertisements from the app.
#4 Non-Renewing Subscription IAP
The last type of IAP is the non-renewing subscription in which the end-user is able to use the item for a fixed period of time and after that time period is passed that item needs to be purchased again for using it.
The best example of a non-renewing subscription is a membership period or a sports session pass for 6 months access.
Steps to Implement IAP In iOS
iTunes Connect Setup
In order to set up your iTunes connect, few things are to be done prior like:
- Setting up a Bank Account: You need to have your bank account setup in your iTunes connect account or else you won't be able to move ahead by using the In-App Purchases services of iOS. Go to the Agreements, Tax, and Banking Section of iTunes Connect to set up your bank account details.
- Creating Sandbox User: After setting up your bank account now you should create your sandbox user so that you can test out the IAP services. To create a sandbox user head over to the Users and Roles section in iTunes Connect and then select the Sandbox Testers option. The sandbox user also allows you to make transactions without any charges.
- Create an iTunes App: Now that you are done with the Sandbox user creation, the next thing that you need to do is create an iOS app on iTunes and go to the 'My Apps' section of the iTunes Connect account or if you want you can even use an existing app. For this step, you also have to create an App ID from your developer account.
- Creating an IAP Product: To create your IAP products, first open your iTunes application and then navigate towards the 'Features' section. Then click on the '+' button and select one of the four displayed types of IAP that are mentioned above. Now you have to provide all of the required metadata related to your IAP product in this section.
The Coding Part in Swift
Always keep your code in a separate class, for example, TIAPHandler is the name of the class. In this class that you created, store all the information related to the In-App Purchases.
Note: The property names 'isLogEnabled' will help you to console the log of the class TIAPHandler. And the 'shared' property will let you interact with every member function that you need to use during the IAP services.
Before we proceed, you need to create few variables in Swift for your IAP product related to the type of IAP that you selected earlier. Creating variables at this point is important because these variables will be handling you IAP request and also an array which will store all your available IAP products.
Class Functions to Use:
- canMakePurchases()?: It will return a boolean value whether the device is able to make a purchase or not.
- fetchAvailableProducts()?: To create a collection of product IDs, add all of them that you want to use into an NSSet object.
- purchaseMyProduct(index: Int): This function will be used to initiate a product purchase as this class function will be raising the dialog. The index will help to get the correct IAP product back from the products array.
- restorePurchase(): This class function is for restoring the IAP and is used whenever a device change is made by the user.
Now that you have selected the Class Function, it's time to set the Delegate method in order to make your product return back using Swift.
Delegate Methods to Use:
- paymentQueueRestoreCompletedTransactionsFinished(_ queue: SKPaymentQueue): Will handle a situation where the user successfully restores an IAP product.
- productsRequest (_ request:SKProductsRequest, didReceiveresponse:SKProductsResponse): This delegate method will return all the IAP products that are available on the iTunes with their IDs that were set by earlier. It had become triggered just after calling the fetchAvailableProducts method.
- paymentQueue(_ queue: SKPaymentQueue, updatedTransactions transactions: [SKPaymentTransaction]): This method was triggered just after calling the purchase(product: SKProduct) method. With this method, you will get all details related to the IAP transaction whether the item is purchased or the transaction is failed.
Implementing the code
First, open the UIViewController and the create an empty array of the type SKProduct using Swift. Then in the viewDidLoad function, set your IAP product IDs and also fetch all details regarding those IAP products.
Note: The user also has the choice to display these details in UICollectionView or UITableView.
TIAPHandler.shared.fetchAvailableProducts()
TIAPHandler.shared.purchaseStatusBlock = {[weak self] (type) in
guard let strongSelf = self else{ return }
if type == .purchased {
let alertView = UIAlertController(title: "", message: type.message(), preferredStyle: .alert)
let action = UIAlertAction(title: "OK", style: .default, handler: { (alert) in
})
alertView.addAction(action)
strongSelf.present(alertView, animated: true, completion: nil)
}
}
After that create an action where you will initialize the transaction window of the IAP services. Like this -
@IBAction func consumable(btn: UIButton){
TIAPHandler.shared.purchaseMyProduct(index: 0)
}
Test it out
To test your code, first sign in with your Sandbox user from your iOS device. Then go to your iOS application and select the action which will initiate the transaction. Because you are using a sandbox user, you won't be charged for the transactions that you make for testing out your IAP services.
Reasons to opt for IAP services
Now that we have completed the steps of implementing IAP in Swift, we should also know the reasons why IAP services are important and should be used for your iOS applications:
- The In-App Purchases are a great way to earn some money in contrary to just simply sell your application to someone else. This is because there are a number of people who are willing to spend their bucks in exchange for extra features and content in an application that they love to use.
- You can also display various advertisements on your iOS application with an additional option to 'Remove Ads' for a small amount of money like $3 to $5.
- If you want you can also offer your iOS app as free and if your target audience like the free version of your app then they would be willing to try on the paid version of your app as well...even if it would cost them money.
- Instead of creating an entirely new and separate app for the paid services, you can just add the in-app purchases options for your already existing application. This way you can release your app's new functionalities as well.
We hope that this article will provide you some great insights regarding the In-App Purchases and its services. Don’t forget to check out our articles on Swift as well.

Uncover executable insights, extensive research, and expert opinions in one place.
Related Content


